Next.js
How to Add Google Analytics to Next.js: Complete Beginner Guide
By Yahya Saeed · 5 min read · 1 views
How to Add Google Analytics to Next.js: Complete Beginner Guide
Building a website is only the first step.
After publishing your website, you need to understand how people are using it. You need to know where visitors are coming from, which pages they read, how long they stay, and what content performs best.
This is where Google Analytics becomes useful.
Google Analytics is a free tool from Google that helps website owners track traffic and understand user behavior. For developers, bloggers, freelancers, and business owners, it provides valuable insights that can help improve content, design, and marketing strategy.
In this guide, you will learn how to add Google Analytics to a Next.js website.
What Is Google Analytics?
Google Analytics is a web analytics platform that tracks visitor activity on your website.
It can show you:
How many people visit your site
Which pages get the most traffic
Where visitors come from
Which devices they use
How long they stay
Which countries your visitors are from
This information helps you make better decisions based on real data instead of guessing.
Why Add Google Analytics to Next.js?
If you are building a blog, portfolio, SaaS website, or business website with Next.js, analytics are very important.
Google Analytics helps you understand:
Which blog posts are performing well
Which pages need improvement
Whether SEO is working
How users move through your website
Which marketing channels bring traffic
Without analytics, you are building blindly.
With analytics, you can improve your website based on actual user behavior.
Step 1: Create a Google Analytics Account
First, go to Google Analytics and create an account.
After creating your account, create a new property for your website.
Choose Google Analytics 4 because it is the latest version of Google Analytics.
After setting up your property, Google will provide a Measurement ID.
It usually looks like this:
G-XXXXXXXXXX
Keep this ID safe because you will need it in your Next.js project.
Step 2: Add Your Measurement ID to Environment Variables
In your Next.js project, create or update your .env.local file.
Add this line:
NEXT_PUBLIC_GA_ID=G-XXXXXXXXXX
Replace G-XXXXXXXXXX with your real Google Analytics Measurement ID.
The NEXT_PUBLIC_ prefix is important because this value needs to be available in the browser.
Step 3: Create a Google Analytics Component
Create a new file:
components/GoogleAnalytics.tsx
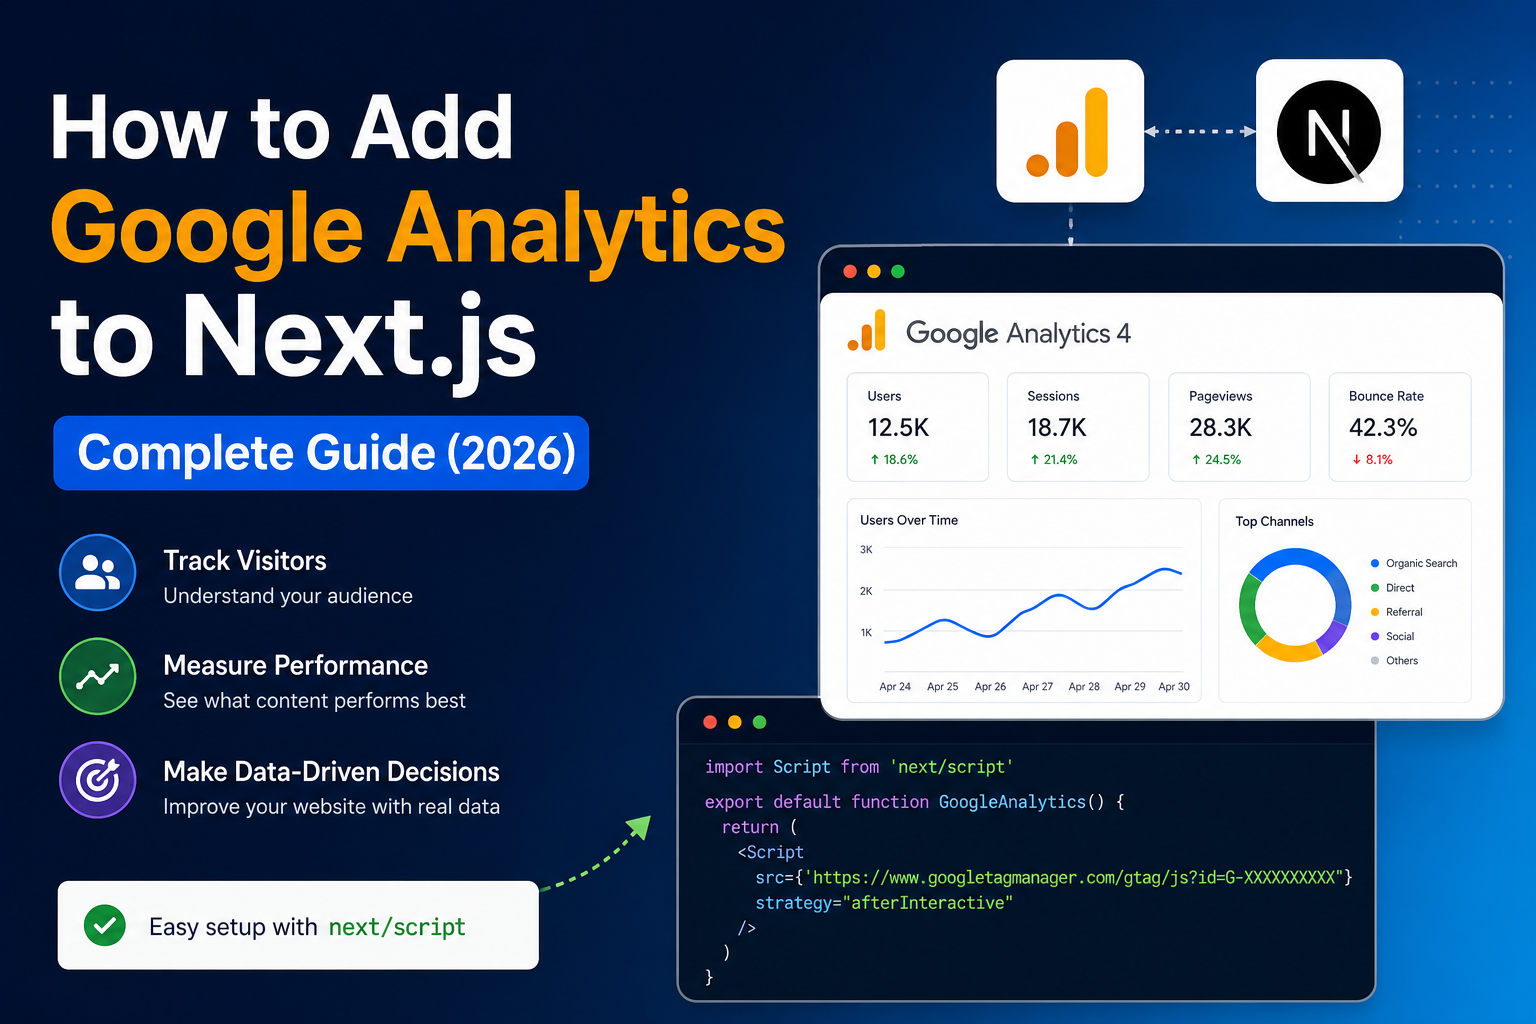
Add this code:
"use client";

import Script from "next/script";

const GA_ID = process.env.NEXT_PUBLIC_GA_ID;

export default function GoogleAnalytics() {
  if (!GA_ID) return null;

  return (
    <>
      <Script
        src={`https://www.googletagmanager.com/gtag/js?id=${GA_ID}`}
        strategy="afterInteractive"
      />

      <Script id="google-analytics" strategy="afterInteractive">
        {`
          window.dataLayer = window.dataLayer || [];
          function gtag(){dataLayer.push(arguments);}
          gtag('js', new Date());

          gtag('config', '${GA_ID}');
        `}
      </Script>
    </>
  );
}
This component loads the Google Analytics script and initializes tracking.
The afterInteractive strategy means the script loads after the page becomes interactive, which is better for performance.
Step 4: Add the Component to Your Layout
Now open your main layout file:
app/layout.tsx
Import the component:
import GoogleAnalytics from "@/components/GoogleAnalytics";
Then add it inside your <body> tag:
export default function RootLayout({
  children,
}: {
  children: React.ReactNode;
}) {
  return (
    <html lang="en">
      <body>
        <GoogleAnalytics />
        {children}
      </body>
    </html>
  );
}
Now Google Analytics will load on every page of your website.
Step 5: Track Page Views in Next.js App Router
Next.js uses client-side navigation, so users can move between pages without a full page reload.
To track page views properly, create another component:
components/AnalyticsPageView.tsx
Add this code:
"use client";

import { useEffect } from "react";
import { usePathname, useSearchParams } from "next/navigation";

const GA_ID = process.env.NEXT_PUBLIC_GA_ID;

export default function AnalyticsPageView() {
  const pathname = usePathname();
  const searchParams = useSearchParams();

  useEffect(() => {
    if (!GA_ID) return;

    const url =
      pathname + (searchParams.toString() ? `?${searchParams.toString()}` : "");

    window.gtag?.("config", GA_ID, {
      page_path: url,
    });
  }, [pathname, searchParams]);

  return null;
}
This tracks route changes when users move between pages.
Step 6: Add TypeScript Support for gtag
If you are using TypeScript, you may get an error because window.gtag is not recognized.
Create a file:
types/gtag.d.ts
Add this:
export {};

declare global {
  interface Window {
    gtag?: (...args: any[]) => void;
    dataLayer?: any[];
  }
}
This tells TypeScript that gtag exists on the browser window.
Step 7: Use AnalyticsPageView in Layout
Update your app/layout.tsx:
import GoogleAnalytics from "@/components/GoogleAnalytics";
import AnalyticsPageView from "@/components/AnalyticsPageView";

export default function RootLayout({
  children,
}: {
  children: React.ReactNode;
}) {
  return (
    <html lang="en">
      <body>
        <GoogleAnalytics />
        <AnalyticsPageView />
        {children}
      </body>
    </html>
  );
}
Now Google Analytics will track both initial page loads and route changes.
Step 8: Test Google Analytics
After deployment, open your website and then go to Google Analytics.
Check the Realtime section.
If everything is working, you should see your visit appear there.
You can also use browser developer tools to confirm that the Google Analytics script is loading correctly.
Best Practices
When using Google Analytics in Next.js, follow these best practices:
Store your Measurement ID in environment variables
Use
next/scriptinstead of a normal script tagLoad analytics after the page becomes interactive
Test tracking after deployment
Avoid tracking sensitive user data
Use analytics to improve content and user experience
Common Mistakes
Some common mistakes include:
Using the wrong Measurement ID
Forgetting the
NEXT_PUBLIC_prefixAdding the script only to one page
Not testing after deployment
Expecting data to appear instantly in all reports
Realtime reports usually update quickly, but standard reports can take time.
Final Thoughts
Adding Google Analytics to a Next.js website is a smart step if you want to grow your blog, portfolio, SaaS, or business website.
It helps you understand your audience, improve your content, and make better decisions based on real data.
Next.js makes the integration simple with next/script, environment variables, and reusable components.
Once analytics are installed, you can stop guessing and start improving your website with confidence.
Related Posts

Why Next.js Is the Best React Framework in 2026
React remains one of the most popular libraries for building web applications, but modern development demands more than just a UI library. Next.js has evolved into a complete framework that helps developers build faster, scale easier, and deliver better user experiences. Here's why Next.js continues to dominate the React ecosystem in 2026.

How to Build a Blog with Next.js 16: Complete Beginner Guide
Learn how to create a modern blog with Next.js 16 using dynamic pages, categories, tags, excerpts, SEO metadata, and a scalable content structure.
Comments
No approved comments yet.